The most-awaited beginner-friendly eye makeup tutorial is here already. Once you learn these steps, you’re going to be a pro!

Do you know the internet is filled with all kinds of makeup tutorials and guides? But this beginner-friendly eye makeup is exclusively lit. It is made so simple and easy that anyone can do it. Try it now!
The Step-by-Step Beginner Friendly Eye Makeup
1. Gather Your Tools and Products

We’ll start with the list of tools you must have–eye primer or Concealer, Neutral Eyeshadow Palette, Eyeliner (Pencil/Gel/Liquid), Mascara, Eyebrow pencil or powder, Eyeshadow brushes, and Eyelash curler (optional).
2. A Little Clean Up Beneath the Eyebrows

This is not necessarily a mandatory step, but yeah, it’s always better to pluck off any ingrown or eyebrow hairs that might be beneath the brows, here and there!
It gives a cleaner look, plus the canvas is entirely spick and span before you start yur painting!
3. Prep Your Eyebrows First!

Many do this step at the end of the eye makeup, but let’s tell you the secret benefit of doing it beforehand. It is less messy and has much lower chances of spoiling your makeup!
Use a brush to lift your brows upward, and with a brow pencil or powder, fill the sparse areas using short, hair-like strokes.
Pro Tip: Focus on the tail and arch for a natural look and set it with a clear brow gel.
4. Prime the Eyelids with a Primer or a Concealer

This is the first step before applying the eyeshadow colors to your eyelid. It helps prevent creasing, keeps the eyeshadow in place, and appears more pigmented, especially with the lighter shades.
Use an eye primer or a small dab of concealer. Apply it over your entire eyelid, from lash line to brow bone, with your ring finger or a brush, blending it evenly.
5. Translucent Powder

Immediately after completely covering all the bumps and uneven skin tones, dust a little bit of translucent powder to set it. This setting helps to keep the layer intact, and specifically, if it is during the hot summers, your eye makeup won’t melt down after this.
6. Choose a Transition Shade

A transition shade is simply the color of your skin; you’ll find it in your eyeshadow palette. This helps the colors blend smoothly with a perfect merger and provides a nice depth to your eyes.
Use a matte medium-brown or taupe shade and, with a fluffy blending brush, sweep the shadow back and forth in the crease where your eyelids fold.
Pro Tip: Blend just like a windshield wiper motion of a car! Also, it doesn’t require a super precise movement; soft and diffused is good to go.
7. Apply Color to The Eyelid

Now, this is the main shade that you will add according to the type of occasion or outfit you are wearing. However, let’s make it simple for you—a versatile choice!
Choose a light matte or shimmer shade like champagne, peach, or rose gold. For better pigment payoff, use a flat shader brush or your fingertip.
Pat the color directly onto your lid and blend the edges slightly into your crease color. That’s it!
8. Deeper The Outer Corners

Well, this is an optional step; however, with this addition, the subtle definition of your eyelids will look fab!
So, choose a slightly darker matte shade like chocolate brown, burgundy, or a deeper taupe. Then, with a smaller blending brush or a pencil brush, just tap the color into the outer “V” (the corner where your lash line and crease meet).
Pro Tip: Always blend inwards, but only in that outer layer!
9. Highlight the Brow Bone and Inner Corner
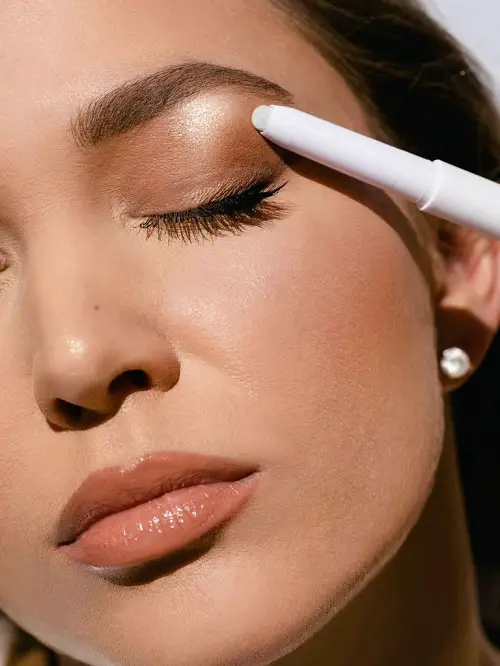
Are you wondering why this step? Because it gives a lifted look with a bright-eyed effect. Don’t believe this? Then why don’t you try it yourself next time? This is, in fact, a secret hack that many almost forget.
Choose a light shimmer or satin shade in off-white or a soft gold. Then dab a tiny amount under the arch of your brow and the inner corner of your eye using a small brush or your pinky!
10. Draw the Boundaries, Curl Up and Mascara On Top!
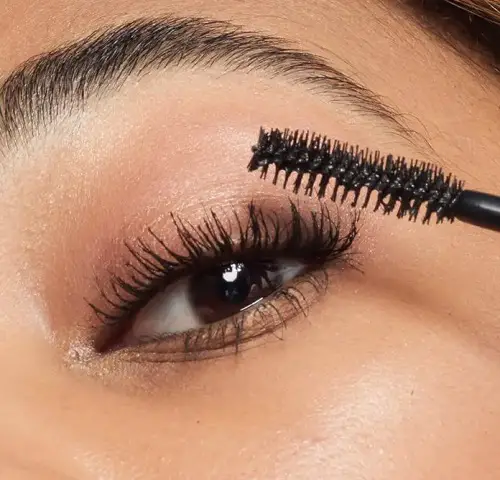
This final step will give you the definition and fabulous finish. It will define and complete the look!
Line your eyes with a black or brown pencil or a liquid liner, over the upper lash line with a gentle wing at the outer edge.
Then open your eyes and use an eyelash curler at the base of your lashes and hold for 5 seconds. Release and apply mascara. All set!
Pro Tip: If your eyes are small, avoid lining the entire lower lash line with black—use a nude or brown pencil in the waterline instead.
Told you! This is a lit tutorial after all. Hey, here are some more Easy Eyeshadow Tips for Beginners That Actually Work.